

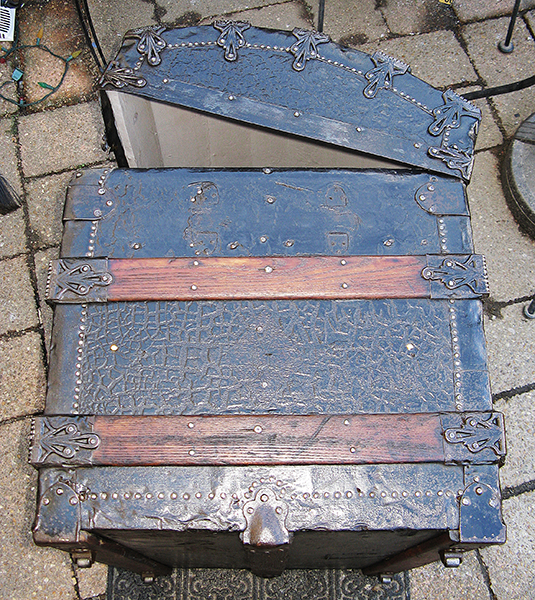
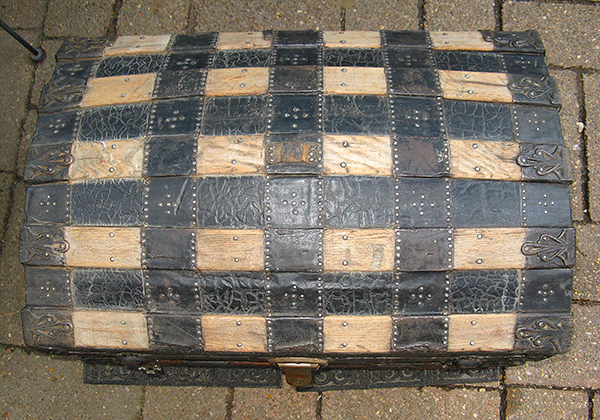
Manufactured sometime around the year 1892 several of the hardware pieces including the lock have 1877 patent dates. The lock is quite substantial and unusual for a trunk. It is nickel plated and normally associate nickel plating with items made after the year 1900. There are approximately 1600 nails that secure this embossed leather clad and oak slat trunk.

After soaking in various solvents and scrubbing with wire brushes and steel wool ad nauseam for a number of hours, the entire trunk was rubbed down with mineral oil. It did a very good job of cleaning up discolorations, rust and dirt from the entire surface. Mineral oil adds a little protection for the metal and wood, but it is considered a treatment and not a finish. The oak slats seen here have darkened quite a bit, but they can be lightened up by applying naptha or mineral spirits and using a dry cloth to absorb the mineral oil that has been absorbed.
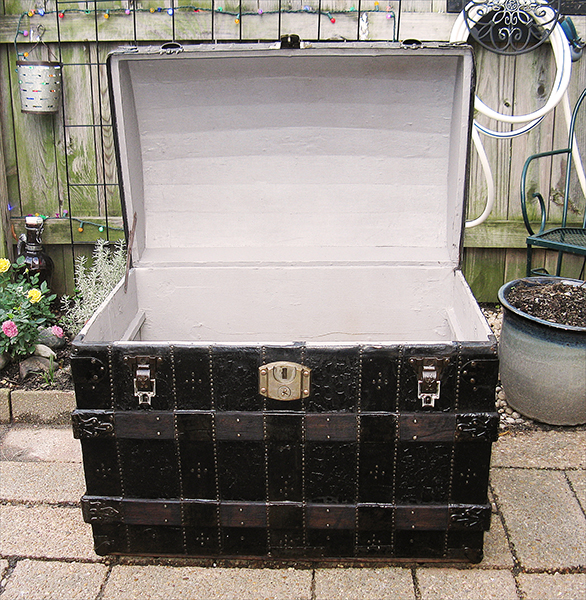
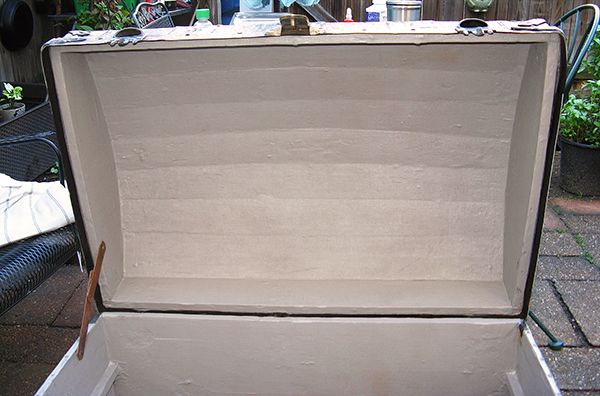
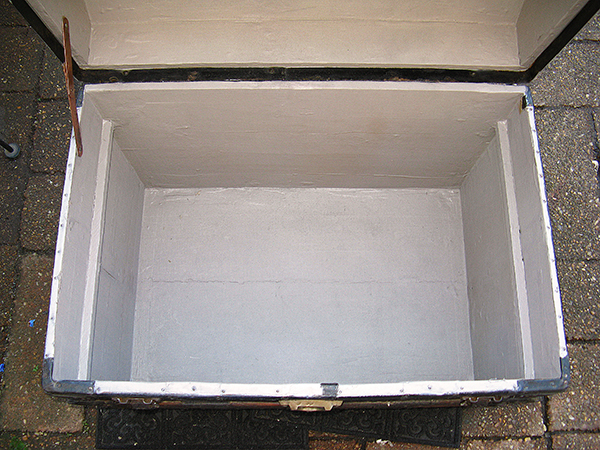
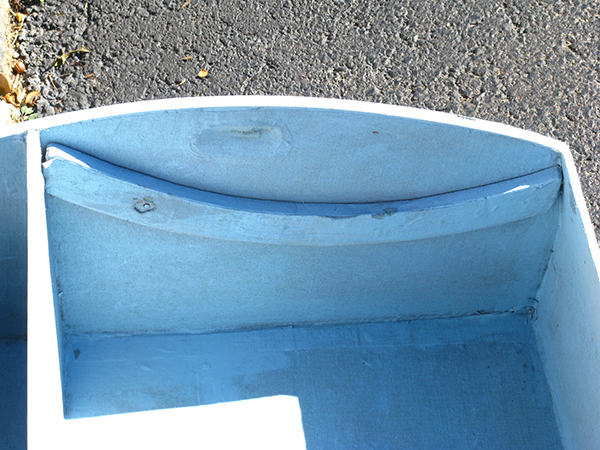
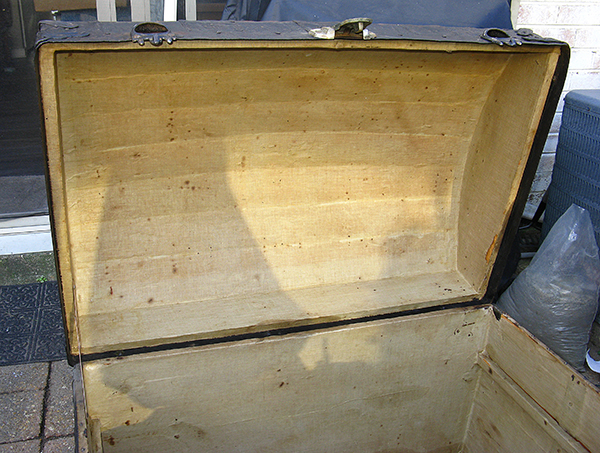
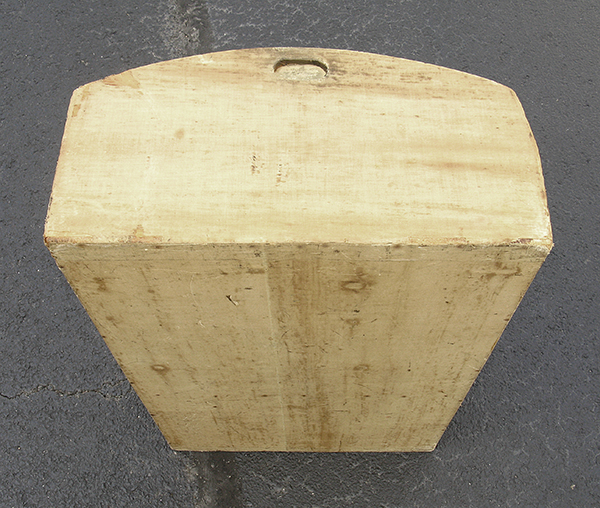
The interior is covered with canvas and not wallpaper. It is mostly intact and is probably original. It has been cleaned and painted with a color called "driftwood". It has a mixture of gray and brown pigment.

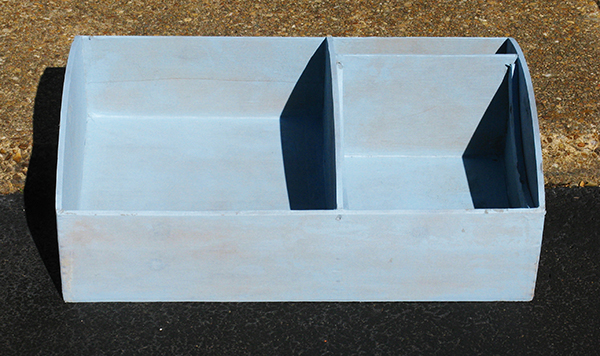
The tray is also covered in canvas and has been painted with a "baby blue" color. Took an entire can of paint to cover the tray and needs more to be complete.

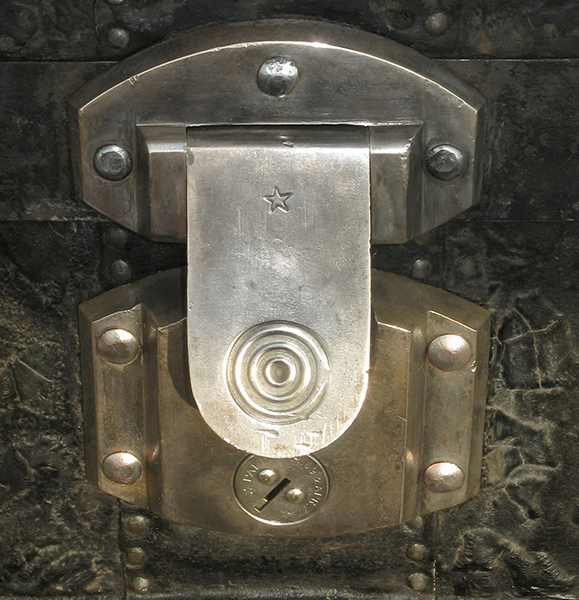
The nickel plated lock appears to be original and the star seen here is probably from a company called Star. The key entry point has markings that read "✩ PAT'D MAR 69 & APR 77 ✩".
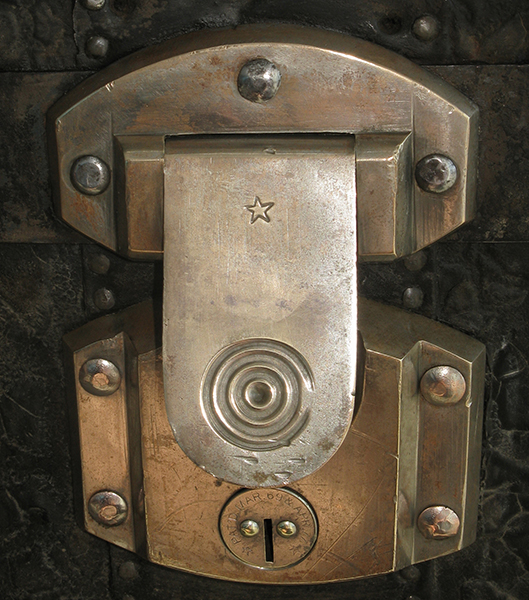
After extensive polishing and cleaning the lock looks better; however, the nickel plating has worn off in spots and the copper flashing below is starting to show through.

The camera images can be quite deceiving and this is another shot of the lock taken moments after the previous photo.
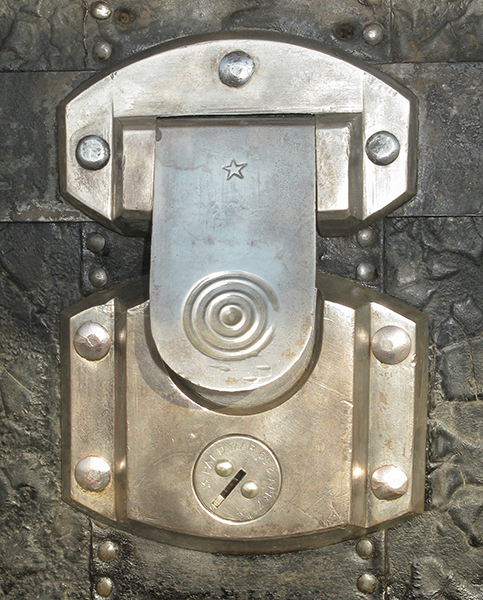
Electro-plated the lock and it is starting to look pretty good.
Took several passes with the electro-plating brush wand and will probably need another session to brighten the overall look.
Still needs some work, but looks a lot better. Caswell sells home brush electro-plating kits that may set you back around $100 for nickel plating kit and a bottle of copper flashing solution.

The hasp and lid lift also appear to be original, but can't figure out why there are copper nails pictured here. Normally hasps and lid lifts of this type are seen on steamer trunks post 1900. This one appears to be the exception and part of the hasp is nickel plated.

There is a lot of shine here, but after 24 hours from the time of the photograph most of the mineral oil is not present. The wood slats soaked up quite a bit, but what happened to the rest?
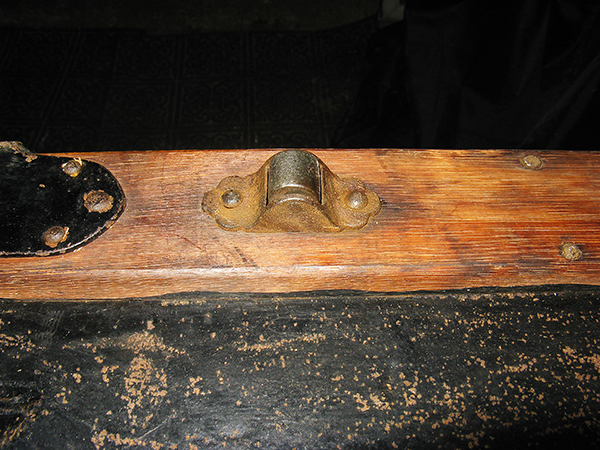
Typically, there is only one lid stay on a trunk. This one is copper plated and in pretty nice condition. Have doubts it is original to the trunk, but do not see any real signs that it is a replacement to the original.

The top wood slat is dark like the ones in the front and the center one on the bottom of the trunk. All four of these slats have the same type of raised tight grain. By removing the mineral oil from the wood and applying a wood conditioner, the final finish would be lighter than what is pictured here. The center hinge pictured here is off center and was apparently moved for some reason. Also, the hinges do not look like they belong on this trunk. Look how the hinges extend below the top wood slat. Do not see any signs that there were ever any other hinges installed. There are also washers supporting quite a few of the clinch nails. This does not make sense for original manufacture. Lastly, most of the paint has been removed from one of the leather panels. It has more of a suede feel to it.

The bottom sheet metal has had a really nice professional repair that does not take away from the trunk value. The bottom slats appear to be original and the rollers are in good working order and are most certainly original.
This style of roller would be difficult to replace. It is a surface mount type and replacement rollers are sub surface mounted. The wood slat would have to be carved out to accept that type of roller.
The rollers have quite a bit of embedded rust that may require something like muriatic acid or rust remover to remove. It would not be wise to replace these. It may be possible to drill out the axle that holds the roller itself and modify in order for it to roll more smoothly.

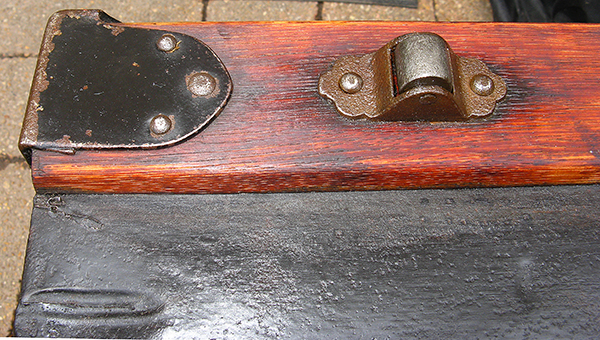
Left side of the trunk before handle and brackets are attached. On the lower right hand side the angle bracket is different than the rest. On the left, part of the bracket is broken off. Could be repaired with an epoxy putty made for metal repair. Both of these items take a little value away from the overall value of the trunk. There is also another professional repair to the sheet metal along the bottom edge.

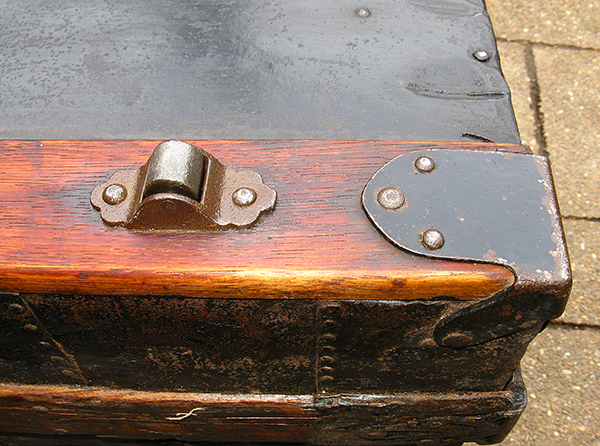
Same side with new leather replacement handle. The leather has been dyed with some wood stain in order to more closely match the color of the wood slats. The leather was rubbed with mink oil on both sides in order to soften and add protection. The clinch nails that hold the handle brackets onto the trunk are specialty nails that are made from a soft iron that is tapered toward the end of the nail. In this way, when hammering into wood and used in conjuction with a heavy metal block pressed onto the other side of the wood, the nail will curl into itself as it is tapped in. May take 40 or 50 taps to get one nail all the way in and curled into itself. Heavy hammering is not recommended as it will tear through the wood.
Right side of the trunk before handle and brackets are attached. There is a diamond pattern in the middle with a couple of clinch nails that is not present on the other side. There appears to be some red coloring that could indicate the original color of the embossed leather. Purely speculative.
Same side with new leather replacement handle. Notice how the leather lays flat when not in use. Good for setting trunk on its side without the leather handle making the trunk wobble. Some of the clinch nails that were tapped in didn't curl onto themselves but bent at right angles. This type of bent nail can be a problem and can be avoided by bending the tip of the nail as it comes through the other side and tapping the tip of the nail back out below the surface and tapping the nail again with a fair amount of pressure with a heavy metal block on the other side. The handles cost $30 for the pair and the clinch nails cost $8. 24 nails are needed and come in packs of 20. It is good to have more nails than you might currently need.
First coat of paint on the interior. Took almost a whole can of spray paint. The strips of wood that support the interior tray interfere with the bottom three nails of each of the handle brackets. Can cause problems since there is a good chance that at least one of the bottom nails will go through or chip off the edge of the interior tray support without curling in on itself.

It is wise not to use all of the paint at once. Some will be needed later for touchup.
First coat of paint on the interior tray. Took almost a whole can of spray paint.
The canvas on the tray is in excellent condition and needed only minor repairs using wood glue.
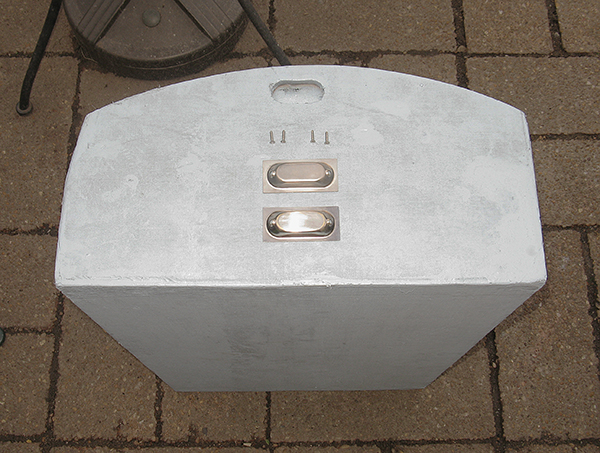
Bottom side of tray.
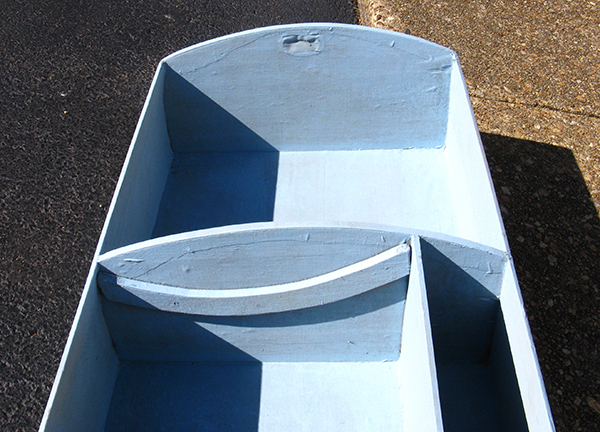
It is not known what this curved piece of canvas wrapped wood is for.
The canvas covers one side of the oval cut out used as a handle.
This is the other side of the tray with another curved wood piece just opoosite of the other one.

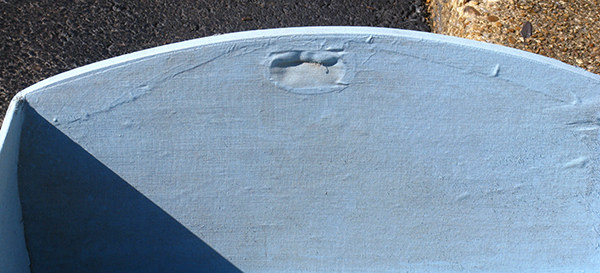
On the top right hand side is where some of the canvas has eroded away.

The damage to the canvas is more evident from this angle.

In all likelyhood there were metal inserts for the tray handle cutout. This particular size of "oblong flush pull" has not been made in years. The pulls were probably oval in nature and not rectangular as seen here. These replacement pulls can be modified to be more like the originals by grinding the edges. The top pull has been sanded with 1200 grit sand paper in order to take some of the chrome shine away. The originals were probably nickel plated. The damage to the canvas has been replaced with wood glue. This works well since wood glue contains a high amount of water and will level out before it dries.
The damaged area has been repainted and allowed to dry enough to be mildly tacky. A cloth with similar pattern to the original canvas has been pressed into the newly painted area and gently pulled off the surface. This created a pattern closely resembling the orignal texture. No paint should stick to the cloth press. Lastly, screws should not be used to attach the pulls to the tray. In fact, there should be no screws at all used to attach anything to the trunk. People do it, but opens the door for criticism.

Original condition of the front to the trunk.
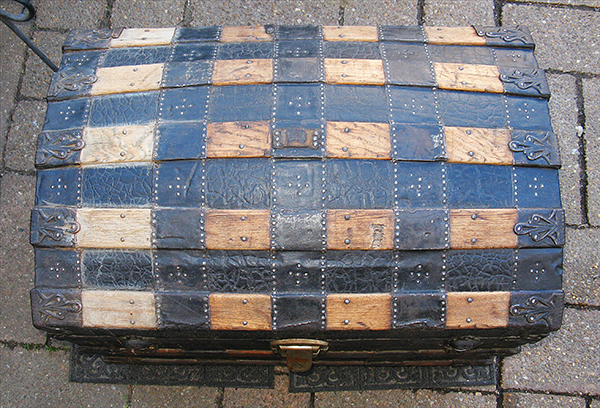
This is what the top looked liked after polishing all the nail heads and using paint remover on the slats. The entire top was scrubbed with lacquer thinner. The lighter color wood was additionally treated with a diluted coating of household bleach and allowed to soak in for 30 minutes. The alkalae bleach was removed and neutralized with acidic household white vinegar. The entire surface was then washed off with water and allowed to dry.
The same bleaching process was done to the rest of the slat areas. The top of the trunk has a chunk of wood missing. There are other spots on the trunk that may indicate that this particular trunk fell off a stagecoach or locomotive train at some point in its life. Apparently, someone liked the trunk enough to have it professionally repaired. This probably happened more than 100 years ago.
The original canvas condition. Mostly disscolored and strong with the aroma of moth balls and mildew. Easily cleaned up with a mild solution of dish detergent, ammonia and warm water.

Original condition of the backside of the trunk. The crocidile or alligator pattern does not look nearly a good as it does on the front.

Although the original condition of the interior is disscolored the canvas only needed minor glue repairs to keep it in strong condition. The canvas adds a little strength to the overall integrity.

After light cleaning it is apparent that the trunk was stored in a damp environment for a number of years. If not for the height of the surface mounted rollers the supporting wood slats would be rotted out at this point.
It appears that the bottom had been hand painted at some point during its life.

It is unusual for the bottom wood slats to be in such good condition. Most of the time they need to be replaced. Most restored trunks don't show pictures of the bottom of the trunk for good reason. They got something to hide.

Original condition of the left side. The toothpicks seen here have been glued into the holes where the handle bracket nails originally went in. Clinch nails work best on wood that hasn't has any nails in it. By filling in the holes the new nails have a better chance of working as intended.

Once the glue holding the toothpicks has dried the toothpicks were cut down to the surface. It would be wise to finish off as much of the area where the handles attach as much as possible. Once the handles are nailed on it would be difficult to refinish around that area.

Original condition right side with the esception of the handle brackets being removed and toothpicks glued into nail holes.

The top side of the handle brackets have been sanded and polished to remove black paint and brighten areas of the metal. This also includes the edges. Once it is painted with black paint and the edges and diamond pattern have been polished, the final clear coat will add a little moredepth to the overall look.

Bottom side of the handle brackets before they are painted.
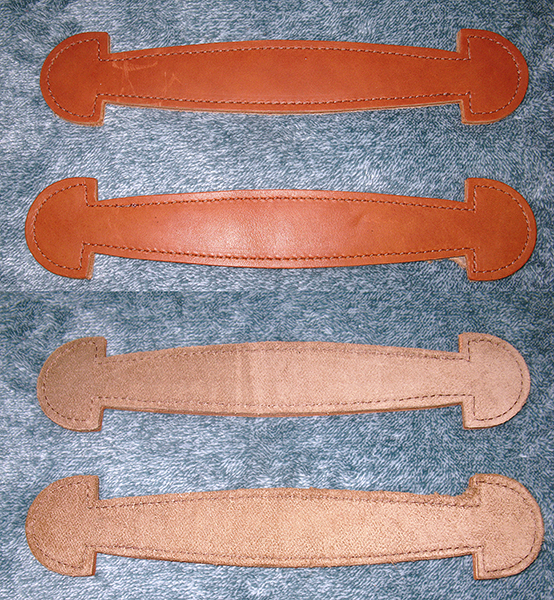
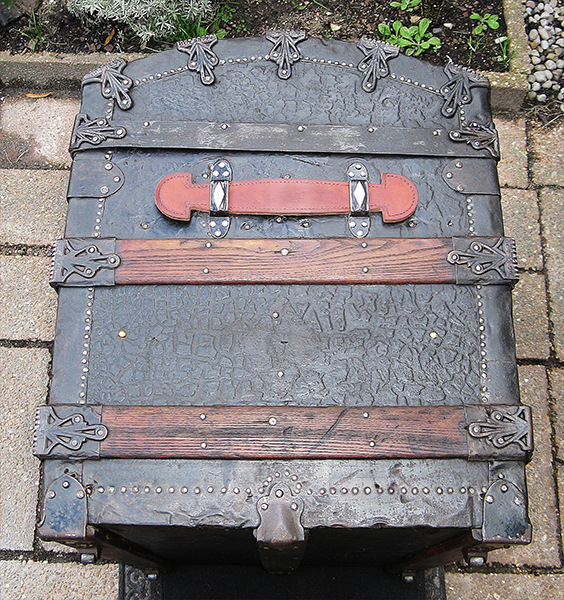
The new handles front and back. Leather handles come in three colors : medium brown (seen here), dark brown and black. It is better to choose a color lighter than what is needed. Trunks tend to look very dark unless brightened up in various ways.
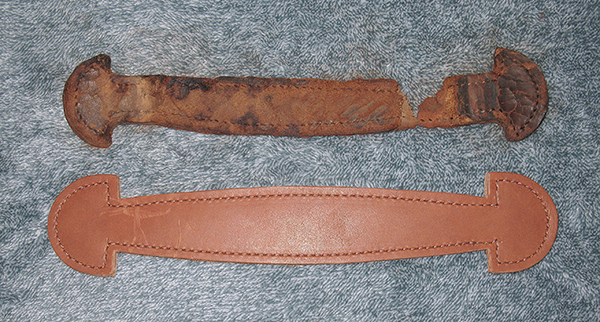
It has been stated that leather can last 100 years. This is unrealistic thinking and 80 years is about the most you can get out of them. The old leather handle pictured here probably hasn't been of any use since the 1980's. It is probably the original handle.
Original condition tray insert. The canvas is thinner and lighter than the typical canvas cloth found today. Canvas that may be on the outside of a trunk tends to be thicker in nature.

The original color was probably a light brownish-green color. Difficult to reproduce with a spray can.

This is what the front looked like after much cleaning and right before mineral oil was applied. Compare how light the wood looks before the oil rub down and afterwards as seen in earlier pictures.

Backside after thorough scrubbing and cleaning, but before any mineral oil was applied.

Bottom slats before any oil has been rubbed on them.

Left side after much scrubbing and cleaning. It is very discolored. Once the mineral oil is rubbed on it most of the discoloration goes away.

Right side after much scrubbing and cleaning.

One of the most over used words in the antiques business is the word patina. It is supposed to mean a finish that comes through exposure to air and UV rays from the sun over a period of time and not exposure to water moisture over a period of time. That type of finish is called corrosion or rust. The keys pictured on the left suffer from moisture damage over time. The key on the right, which happens to fit and operate the lock, was polished and appears to be nickel plated.
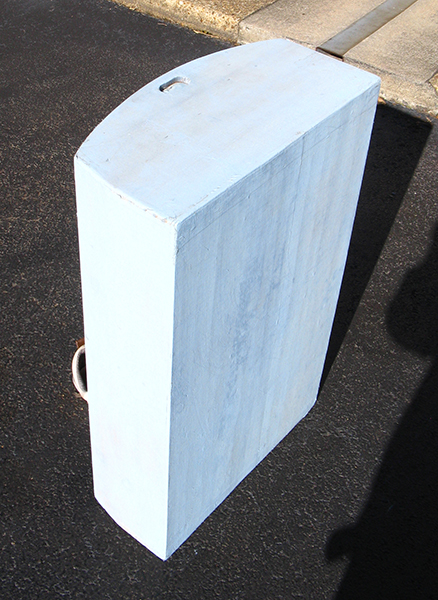
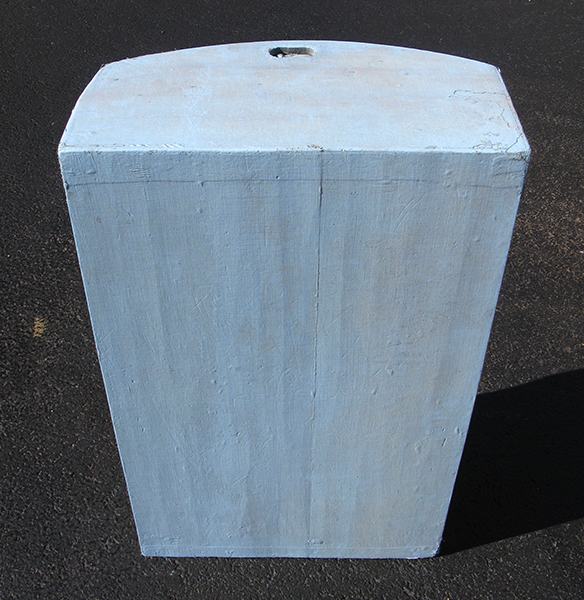
Antique Dome Top Trunk, Circa 1892
A collection of images from a semi-restored medium sized dark and brooding antique dome top trunk complete with inner tray and working lock with key. Could be considered a "Satatoga" style trunk since this particular piece has embossed leather and heavy gauge ornate hardware.
Dimensions : Width 30.5 in. x Depth 20.25 in. x Height 26 in.
The flash from the camera makes the trunk look more rough, dusty or dirty than it really is. The trunk looks much nicer in person than the dark photographs indicate. You can zoom in on the images if you mouse over them. During autoplay zoom is disabled.
Valued in the range of $300 - $325.